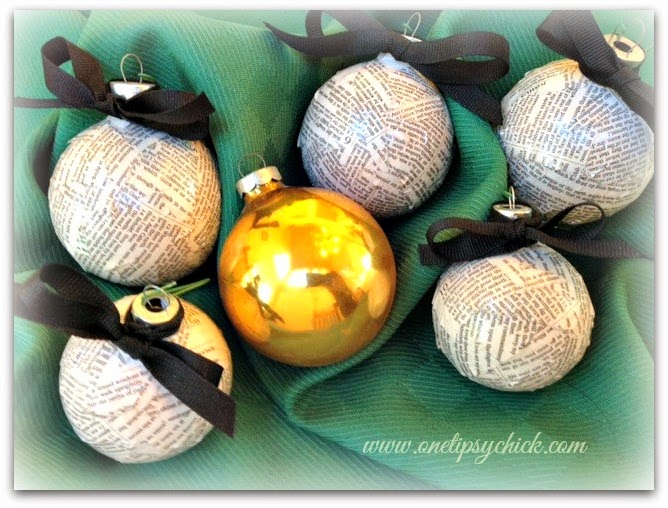
Do you have any really old Christmas balls that started to discolor or chip? Instead of throwing them away, recycle them into something new!
I originally started out with a Halloween project that quickly tuned into a Christmas one. I found these large ornaments in the dollar store that had the vertical lines like a pumpkin. I thought I could Mod Podge and turn it into a pumpkin but it didn’t really work. I decided to keep them as Christmas ornaments and revamp some of the old ornaments I was planning to ditch.
DIY Book Page Ornaments:
- Old Christmas Balls or a Box of Inexpensive Ones from Dollar Store
- Mod Podge
- Small Paint Brush or Sponge applicator
- An Old Book (Pages that are too thick or laminated are more difficult to work with)
- Translucent Glitter Spray (OR) Opalescent “Snowy” Glitter and a Spray Sealant
Make sure your ornaments are clean and dust free. Remove the metal cap and hook. Have some pages cut or torn in pieces that fit the size of your ornament. I prefer to tear the pages. Now here is where you can get creative. You can choose any old book or one that has a special theme or meaning to you. Perhaps a book of poetry, or a children’s book, or one of your favorite novels. Or if you are making a set as a gift, you can personalize it by selecting a topic of interest to the lucky recipient. I chose to make mine Scripture Ornaments. I purchased a Bible at the Dollar Store and used the pages for my ornaments. Bible pages are very thin, so it was a little difficult to work with. Sometimes if I added too much Mod Podge, the paper would get too wet and tear apart. I had to make a few with an extra layer of paper to cover my mishaps.
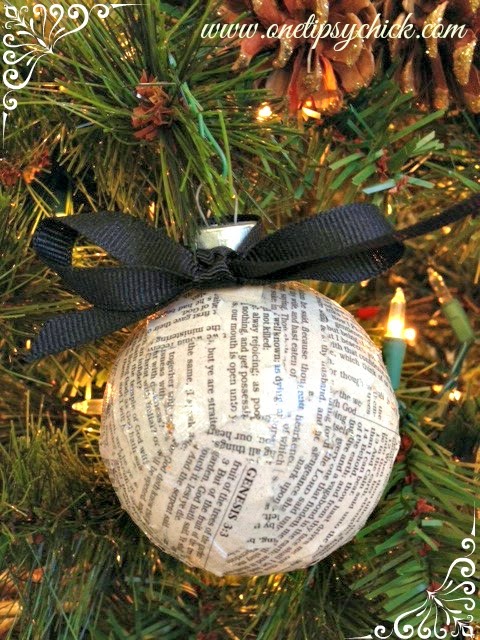
Spread a thin layer of Mod Podge on one section of an ornament. Carefully press the paper to the ornament and use your applicator with a little more Mod Podge to firmly adhere it to the ball. Continue until it is completely covered. Since the neck of glass ornaments are thin and fragile, you need to work very carefully or the neck may crack off. (I broke 3)

If you are using glitter instead of the spray, add it to the ball while the Mod Podge is still wet. Allow to dry completely before adding your sealant. If you are using spray glitter, then wait for the Mod Podge to dry before using it. At the time, I couldn’t find the exact glitter I needed in stock locally, so I opted to use the spray glitter. Its difficult to see in the photos, but they do sparkle. I’ve seen larger, opalescent glitter applied to book page crafts that looked like glistening snow. So beautiful!
Once dry, replace the metal cap, tie some ribbon around the top to match your color scheme and you’re ready to hang your beautiful ornaments!
[…] What a terrific idea on recycling old ornaments into modern ones! Tutorial by One Tipsy Chick […]